🌴 Dive into the heart of Filipino cuisine with this irresistible cassava cake, a dessert that captures the essence of the tropics in every bite. This rich, chewy treat, layered with sweet macapuno (coconut sport strings) and crowned with a luscious custard glaze, is a crowd-pleaser at any gathering. Whether it’s a family celebration, a cozy potluck, or a quiet evening craving something sweet, this cassava cake delivers a burst of creamy, coconutty goodness that lingers on your palate and in your memories.
This recipe is naturally gluten-free, easy to whip up, and packed with tropical flavors that transport you to a sunny island with every spoonful. The combination of chewy cassava, fragrant coconut milk, and delicate macapuno strings creates a dessert that’s both comforting and exotic. Let’s explore why this cassava cake will steal your heart and keep you coming back for more.
Why This Cassava Cake Recipe Stands Out
🍰 Unforgettable Texture: The chewy cassava base meets a silky custard topping, creating a delightful contrast that melts in your mouth.
🥥 Tropical Bliss: Coconut milk and macapuno infuse every bite with a sweet, fragrant taste of the Philippines.
🌾 Gluten-Free Goodness: Made with grated cassava (yuca), it’s naturally free of gluten, perfect for all dessert lovers.
⏱️ Simple to Make: With straightforward steps, this recipe is beginner-friendly yet yields bakery-worthy results.
😋 Perfect for Sharing: Its rich flavors and generous portions make it ideal for gatherings or gifting.
This recipe is crafted to keep you hooked, with each step designed to spark joy and anticipation as you create a dessert that’s as beautiful as it is delicious. Let’s get started on this tropical adventure!
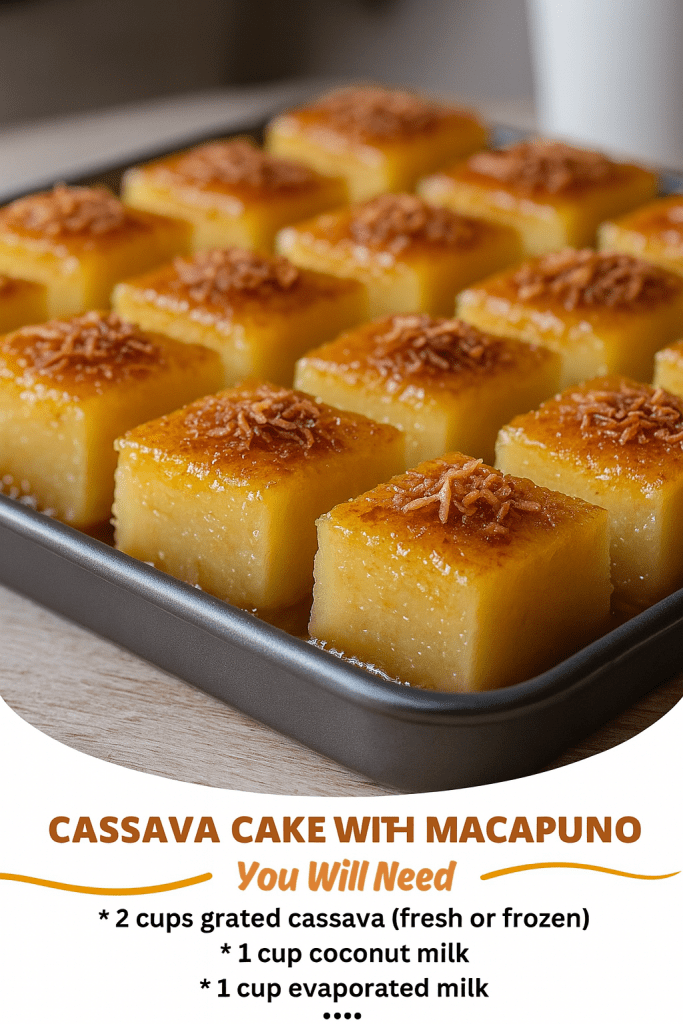
Ingredients for Cassava Cake with Macapuno
🥄 Serves 12-16
This recipe fills a 9×13-inch baking dish, making it perfect for sharing with family and friends. Gather these ingredients to bring this Filipino classic to life.
For the Cake Base
- 4 cups (500g) grated cassava (fresh or frozen, thawed)
- 1 can (13.5 oz) coconut milk (full-fat for maximum creaminess)
- 1 can (14 oz) sweetened condensed milk
- 3 large eggs
- ½ cup (100g) granulated sugar
- ½ cup (120ml) evaporated milk
- 1 tsp vanilla extract
- ¼ tsp salt
For the Macapuno Layer
- 1 jar (12 oz) macapuno (coconut sport strings), drained
For the Custard Topping
- 1 can (13.5 oz) coconut milk
- 3 large egg yolks
- ¼ cup (50g) granulated sugar
- 1 tbsp cornstarch (optional, for a thicker glaze)
Each ingredient plays a starring role in building the cake’s signature texture and flavor. Fresh cassava offers an authentic chew, while macapuno adds a sweet, stringy surprise that elevates this dessert to new heights. Ready to transform these simple ingredients into something magical? Let’s dive into the process.
Step-by-Step Instructions for Cassava Cake Perfection
Follow these easy steps to create a cassava cake that’s sure to impress. Each stage is designed to be approachable, ensuring your dessert comes out flawless every time.
Step 1: Prepare the Cassava Batter
🥣 In a large mixing bowl, combine the grated cassava, coconut milk, sweetened condensed milk, eggs, granulated sugar, evaporated milk, vanilla extract, and salt. Stir until the mixture is smooth and well-blended, about 2-3 minutes. The batter should be thick yet pourable, with a creamy consistency that promises a rich, indulgent cake. If using frozen cassava, ensure it’s fully thawed and gently squeeze out any excess liquid to avoid a watery texture.
This step is where the magic begins, as the ingredients come together to form the heart of the cake. The sweet aroma of coconut milk and vanilla will fill your kitchen, setting the stage for what’s to come.
Step 2: Layer the Cake
🍥 Preheat your oven to 350°F (175°C) and grease a 9×13-inch baking dish with butter or non-stick spray. Pour half of the cassava batter into the dish, spreading it evenly with a spatula. Next, evenly distribute the drained macapuno over the batter, creating a luscious layer of sweet coconut strings. Gently pour the remaining batter over the macapuno, ensuring it’s fully covered for a beautiful, even finish.
The macapuno layer is the secret weapon of this cake, adding a chewy, sweet surprise that makes every slice unforgettable. Take your time to spread it evenly for the perfect balance in every bite.
Step 3: Bake the Cake
🔥 Place the baking dish in the preheated oven and bake for 45-50 minutes, or until the cake is set but still slightly jiggly in the center. The edges should be lightly golden, and a toothpick inserted into the cake should come out mostly clean. Don’t worry if it’s not fully firm yet—the custard topping will add structure in the next step.
As the cake bakes, your kitchen will fill with the warm, tropical scent of coconut and cassava, making it hard to resist sneaking a peek. This is the moment when anticipation builds, and you know something delicious is on the way.
Step 4: Create the Custard Glaze
🥄 In a medium saucepan, whisk together the coconut milk, egg yolks, sugar, and cornstarch (if using). Cook over medium heat, stirring constantly, until the mixture thickens slightly, about 5-7 minutes. The glaze should coat the back of a spoon but remain pourable. Carefully pour the custard over the partially baked cake, spreading it evenly to cover the surface. Return the dish to the oven and switch to the broiler setting. Broil for 3-5 minutes, watching closely, until the custard turns a gorgeous golden brown.
This glossy custard topping is what gives the cake its signature look and creamy finish. The golden hue adds visual appeal, while the rich flavor ties the whole dessert together.
Step 5: Cool and Slice
❄️ Remove the cake from the oven and let it cool at room temperature for at least 1 hour. The custard will continue to set as it cools, making it easier to slice into neat, beautiful squares. Use a sharp knife to cut the cake into 12-16 pieces, depending on your preferred portion size. Serve at room temperature or chilled for an even more refreshing treat.
Patience is key here—letting the cake cool ensures clean slices and allows the flavors to meld into a harmonious, tropical delight. Each bite is a perfect balance of chewy, creamy, and sweet.
Pro Tips for the Best Cassava Cake
✨ Fresh vs. Frozen Cassava: Fresh cassava delivers the most authentic texture, but frozen is a convenient alternative. If using frozen, thaw it completely and squeeze out excess liquid to prevent a soggy cake.
🌟 Macapuno Magic: Can’t find macapuno? Sweetened coconut strips (buko) make a great substitute, or you can skip the layer for a classic cassava cake.
🥥 Full-Fat Coconut Milk: Opt for full-fat coconut milk for the richest flavor and creamiest texture.
🍰 Make Ahead: This cake tastes even better the next day as the flavors deepen. Store it in the fridge for up to 3 days, covered tightly.
🔪 Clean Cuts: For perfect slices, dip your knife in warm water and wipe it clean between cuts.
These tips ensure your cassava cake is a showstopper, whether you’re a first-time baker or a seasoned pro. The little details make all the difference in creating a dessert that’s as stunning as it is delicious.
5 Mouthwatering Variations to Try
Take your cassava cake to the next level with these creative twists. Each variation adds a unique spin, keeping the tropical vibe while introducing new flavors to excite your taste buds.
🍠 Ube Cassava Cake: Mix ½ cup of ube halaya (purple yam jam) into the batter for a vibrant purple hue and nutty sweetness.
🍍 Pineapple Paradise: Fold in ½ cup of crushed pineapple (drained) for a tangy, tropical burst.
🍯 Latik Topping: Simmer coconut cream until it forms golden, crispy crumbs, then sprinkle over the custard for extra crunch.
🍫 Chocolate Chip Indulgence: Add ½ cup of mini chocolate chips to the batter for a decadent twist.
🌰 Cashew Crunch: Scatter toasted cashews over the custard before broiling for a nutty, caramelized finish.
These variations let you customize the cake to suit your mood or occasion, making it a versatile dessert that never gets old. Experiment with one or combine a few for a truly unique creation.
Serving and Storing Your Cassava Cake
🍽️ Serving Suggestions: Serve this cake as the star of your dessert table at birthdays, holidays, or casual gatherings. Pair it with a cup of coffee or tea to balance the sweetness, or go all-in with a scoop of coconut ice cream for an extra tropical treat.
🧊 Storage Tips: Store leftovers in an airtight container in the refrigerator for up to 3 days. The cake can also be frozen (without the custard topping) for up to 1 month. Thaw in the fridge overnight before adding the custard and broiling.
🔄 Reheating: If you prefer it warm, pop a slice in the microwave for 10-15 seconds to restore its soft, chewy texture.
This cassava cake is as practical as it is delicious, making it easy to enjoy now or save for later. Its versatility ensures it fits seamlessly into any occasion, from festive celebrations to quiet weeknight desserts.
Why This Recipe Keeps You Coming Back
This cassava cake with macapuno isn’t just a dessert—it’s a love letter to Filipino culture, a celebration of tropical flavors, and a testament to the joy of simple ingredients coming together in perfect harmony. Every bite tells a story of tradition, warmth, and indulgence, making it impossible to resist. The chewy cassava, sweet macapuno, and creamy custard create a symphony of textures and tastes that linger long after the last crumb is gone.
Whether you’re sharing it with loved ones or savoring a slice on your own, this cake has a way of bringing people together and sparking smiles. Its ease of preparation, crowd-pleasing appeal, and endless variations make it a recipe you’ll turn to again and again. So, preheat your oven, grab your ingredients, and let this cassava cake transport you to a tropical paradise right in your own kitchen.
🌺 Ready to make this creamy, dreamy dessert? Follow the steps above, and soon you’ll be slicing into a masterpiece that’s as beautiful as it is delicious. Happy baking!


