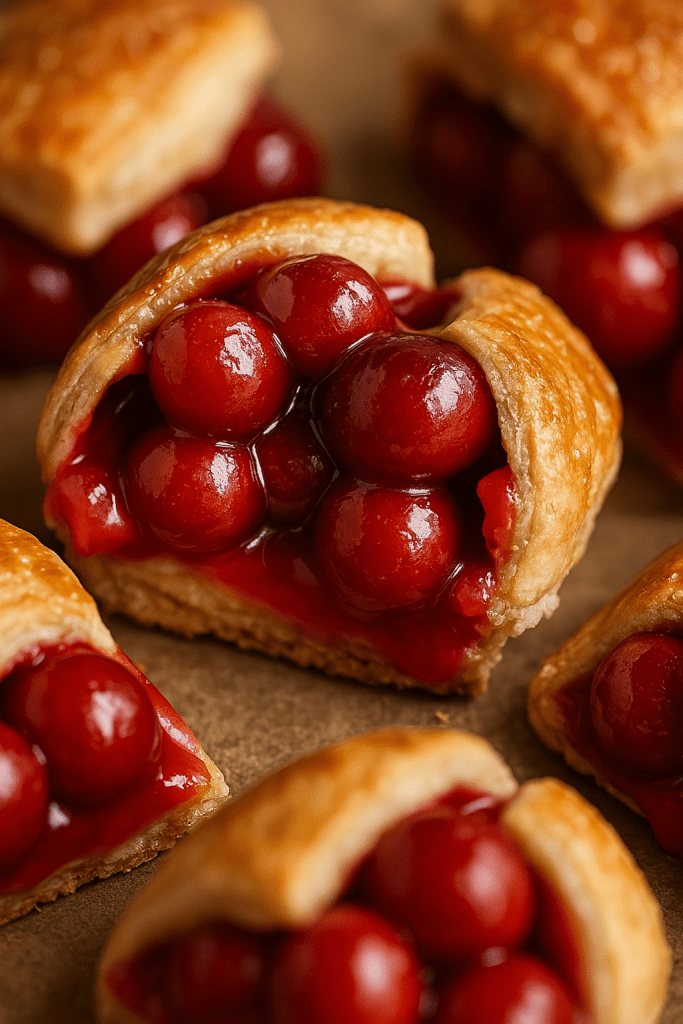
Imagine biting into a warm, golden pocket of flaky puff pastry, only to discover a burst of sweet, tangy cherry filling that melts in your mouth. These Cherry Pie Bombs are the ultimate dessert for anyone who loves the classic comfort of cherry pie but craves something fun, portable, and oh-so-easy to make. Perfect for parties, picnics, or a cozy night in, these little treats are designed to steal the show. With just a handful of ingredients and less than 30 minutes, you can create a dessert that’s as delightful to eat as it is to share. Let’s dive into this irresistible recipe that’s sure to spark joy and satisfy your sweet tooth!
Why Cherry Pie Bombs Are Your New Favorite Dessert
🌟 Bite-Sized Bliss: These mini pastries are perfectly portioned, making them ideal for snacking, sharing, or indulging without guilt. Each bomb delivers all the flavor of a classic cherry pie in one adorable package.
🍒 Quick and Effortless: With store-bought puff pastry and canned cherry filling, you can whip up these treats in under 30 minutes. They’re perfect for busy days when you want a homemade dessert without the fuss.
🎉 Endlessly Customizable: While cherries steal the spotlight, you can swap the filling for blueberries, apples, or even a decadent chocolate spread. The possibilities are as endless as your imagination.
🍨 Versatile and Crowd-Pleasing: Serve them warm with a scoop of vanilla ice cream for a cozy treat, or enjoy them cold as a grab-and-go snack. They’re a hit at any gathering, from casual picnics to elegant dinner parties.
These Cherry Pie Bombs aren’t just a dessert—they’re a moment of joy. Whether you’re baking for loved ones or treating yourself, they bring a touch of nostalgia and comfort that’s hard to resist. Ready to make some magic in the kitchen? Let’s get started!
Ingredients You’ll Need
To create these delightful Cherry Pie Bombs, you’ll need just a few simple ingredients. This recipe yields 12–16 bombs, perfect for sharing (or keeping all to yourself!).
For the Bombs
- 1 sheet puff pastry (store-bought or homemade, thawed if frozen): The buttery, flaky foundation of your bombs.
- 1 can (14 oz) cherry pie filling: Choose a high-quality brand for the best flavor, or make your own for a personal touch.
- 1 egg, beaten: For a glossy, golden egg wash that gives your bombs that bakery-worthy shine.
- Coarse sugar (optional): A sprinkle adds a sweet crunch and a touch of sparkle.
For Serving
- Vanilla ice cream (optional): A creamy scoop elevates these bombs to dessert heaven.
- Powdered sugar (optional): A light dusting adds a touch of elegance.
With these ingredients in hand, you’re ready to create a dessert that’s as beautiful as it is delicious. Let’s walk through the steps to bring these Cherry Pie Bombs to life.
Step-by-Step Instructions
Follow these simple steps to create your own batch of Cherry Pie Bombs. Each step is designed to be straightforward, so even beginner bakers can achieve perfect results.
1. Preheat and Prep
Start by preheating your oven to 400°F (200°C). This ensures your bombs bake evenly and achieve that golden, flaky texture. Line a baking sheet with parchment paper or a silicone baking mat to prevent sticking and make cleanup a breeze. A well-prepped kitchen sets the stage for baking success!
2. Cut and Fill the Pastry
Roll out your puff pastry sheet on a lightly floured surface to smooth out any creases. Using a sharp knife or pizza cutter, divide the pastry into 12–16 equal squares, each about 3×3 inches. Don’t worry about perfection—slight variations add to the homemade charm.
Place 1–2 teaspoons of cherry pie filling in the center of each square. Be careful not to overfill, as the filling will expand during baking and could cause your bombs to burst. A small spoonful is all you need for that perfect burst of cherry flavor.
3. Seal and Shape
This is where the magic happens! Fold the corners of each pastry square toward the center, pinching them together to form a small bundle or “bomb” shape. Press the seams firmly to seal them tightly, preventing any leaks during baking. Place the bombs seam-side down on your prepared baking sheet, spacing them about 1–2 inches apart to allow for puffing.
4. Add Finishing Touches
Brush the tops of each bomb with the beaten egg using a pastry brush. This egg wash gives your bombs a glossy, professional finish that’s sure to impress. For an extra touch of sweetness and texture, sprinkle coarse sugar over the tops. This step is optional but adds a delightful crunch that complements the flaky pastry.
5. Bake to Perfection
Pop the baking sheet into the preheated oven and bake for 15–20 minutes, or until the pastry is puffed up and golden brown. Your kitchen will fill with the irresistible aroma of buttery pastry and sweet cherries—a sure sign that something delicious is on the way. Once baked, remove the bombs from the oven and let them cool slightly on the baking sheet.
6. Serve and Savor
These Cherry Pie Bombs are ready to shine! Dust them with powdered sugar for a touch of elegance, or serve them warm with a scoop of vanilla ice cream for an indulgent treat. They’re just as delicious at room temperature, making them perfect for packing into lunchboxes or bringing to a picnic. However you serve them, these bombs are sure to bring smiles all around.
Tips for Perfect Cherry Pie Bombs
🌟 Choose Quality Pastry: Store-bought puff pastry is a time-saver and works beautifully, but if you’re feeling ambitious, homemade puff pastry adds an extra layer of flakiness. Look for all-butter puff pastry for the richest flavor.
🍒 Avoid Overfilling: A little filling goes a long way. Too much can cause the bombs to burst open, losing that perfect shape. Stick to 1–2 teaspoons for best results.
🎨 Get Creative with Fillings: While cherry is a classic, don’t be afraid to experiment. Try blueberry, apple, or even a savory filling like cheese and herbs for a fun twist. The puff pastry is a versatile canvas for your culinary creativity.
❄️ Make Ahead and Freeze: Assemble your bombs, place them on a baking sheet, and freeze until solid. Transfer to a freezer bag for up to a month. When ready to bake, pop them straight into the oven, adding a few extra minutes to the baking time.
These tips will help you nail the recipe every time, ensuring your Cherry Pie Bombs are as beautiful as they are delicious.
Why This Recipe Steals Hearts
There’s something undeniably special about these Cherry Pie Bombs. The buttery, flaky puff pastry wraps around a sweet, tangy cherry filling, creating a contrast of textures and flavors that’s pure comfort food. Each bite delivers the nostalgic warmth of a homemade cherry pie, but in a fun, portable package that’s perfect for any occasion. The golden, sugary exterior adds a satisfying crunch, while the gooey filling bursts with flavor, making every bite a moment to savor.
These bombs aren’t just about taste—they’re about connection. Baking them for friends or family is a way to share love and create memories. Imagine passing around a plate of these at a summer barbecue, watching kids giggle as they grab seconds, or surprising a loved one with a batch on a cozy evening. They’re more than a dessert; they’re a reason to gather, laugh, and enjoy the simple pleasures in life.
Variations to Try
One of the best things about Cherry Pie Bombs is their versatility. Here are a few ideas to make this recipe your own:
🍎 Apple Pie Bombs: Swap the cherry filling for apple pie filling, spiced with cinnamon and nutmeg, for a fall-inspired treat.
🫐 Berry Blast Bombs: Mix blueberry, raspberry, or strawberry filling for a vibrant, fruity twist.
🍫 Chocolate-Hazelnut Bombs: Fill your pastry with a spoonful of chocolate-hazelnut spread for a decadent, crowd-pleasing variation.
🧀 Savory Bombs: Go savory with fillings like cream cheese and chives, or spinach and feta, for a delightful appetizer.
Each variation lets you put your own spin on this recipe, keeping it fresh and exciting every time you bake.
Storing and Reheating
Cherry Pie Bombs are best enjoyed fresh, but they store beautifully for later enjoyment. Store cooled bombs in an airtight container at room temperature for up to 2 days or in the refrigerator for up to 5 days. To reheat, pop them in a 350°F (175°C) oven for 5–7 minutes to restore their crispiness. Avoid microwaving, as it can make the pastry soggy.
For longer storage, freeze baked or unbaked bombs in a single layer on a baking sheet, then transfer to a freezer bag. Bake frozen bombs at 400°F (200°C) for 20–25 minutes, or reheat baked bombs in a 350°F (175°C) oven for 10–12 minutes.
A Dessert That Brings People Together
These Cherry Pie Bombs are more than just a recipe—they’re a way to create moments of joy. Whether you’re baking for a crowd or treating yourself to a sweet escape, their adorable size, flaky texture, and burst of cherry flavor make them impossible to resist. They’re the kind of dessert that sparks conversation, inspires smiles, and leaves everyone asking for the recipe.
So, what are you waiting for? Grab your puff pastry, crack open a can of cherry filling, and let these Cherry Pie Bombs work their magic. Your kitchen is about to become the happiest place in the house! Share your creations with us—we’d love to hear how you made this recipe your own. Happy baking! 🍒✨


