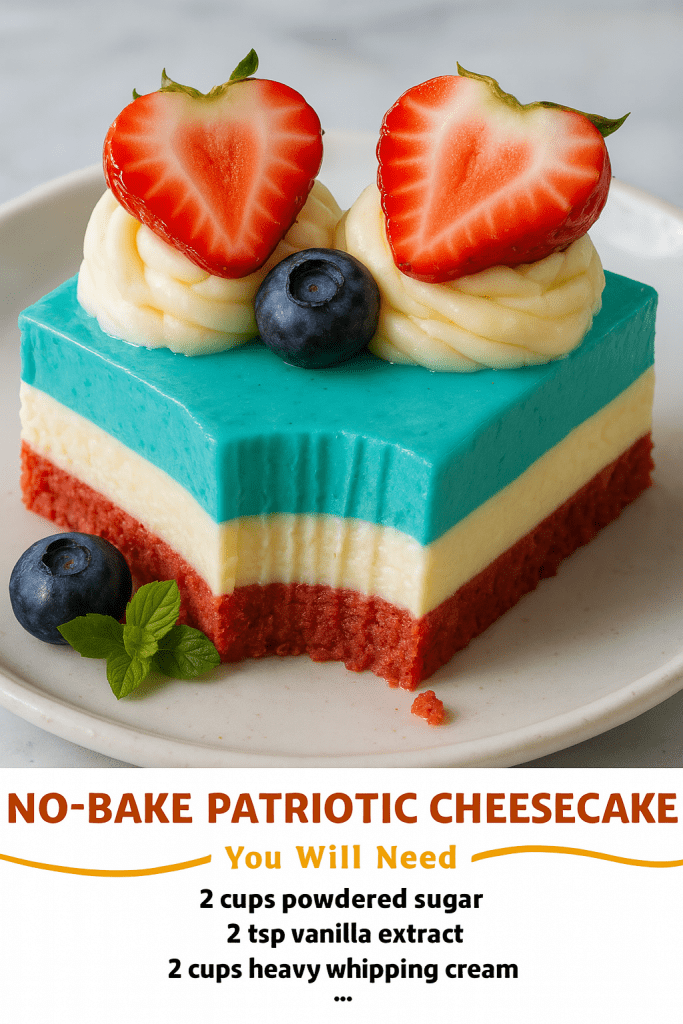
There’s something magical about a dessert that looks as good as it tastes, especially when it requires no oven and comes together with ease. The No-Bake Patriotic Cheesecake is that dessert—a stunning red, white, and blue masterpiece that captures the spirit of celebration. With its buttery golden Oreo crust, creamy vanilla cheesecake layer, vibrant blue Jell-O topping, and fresh berry garnish, this treat is a showstopper for summer gatherings, holiday barbecues, or any occasion that calls for a touch of festive flair. Whether you’re hosting a Fourth of July party or simply craving a cool, creamy dessert, this recipe will steal the spotlight and leave everyone asking for seconds.
What makes this cheesecake so irresistible? It’s the perfect blend of simplicity and elegance. You don’t need to be a baking pro to create a dessert that looks like it came from a gourmet patisserie. The no-bake method means you can skip the heat of the oven, making it ideal for warm summer days. Plus, it can be made ahead of time, giving you more moments to enjoy with friends and family. Let’s dive into why this dessert is a must-try and how you can create it step-by-step to wow your guests.
Why This No-Bake Patriotic Cheesecake Will Steal Your Heart
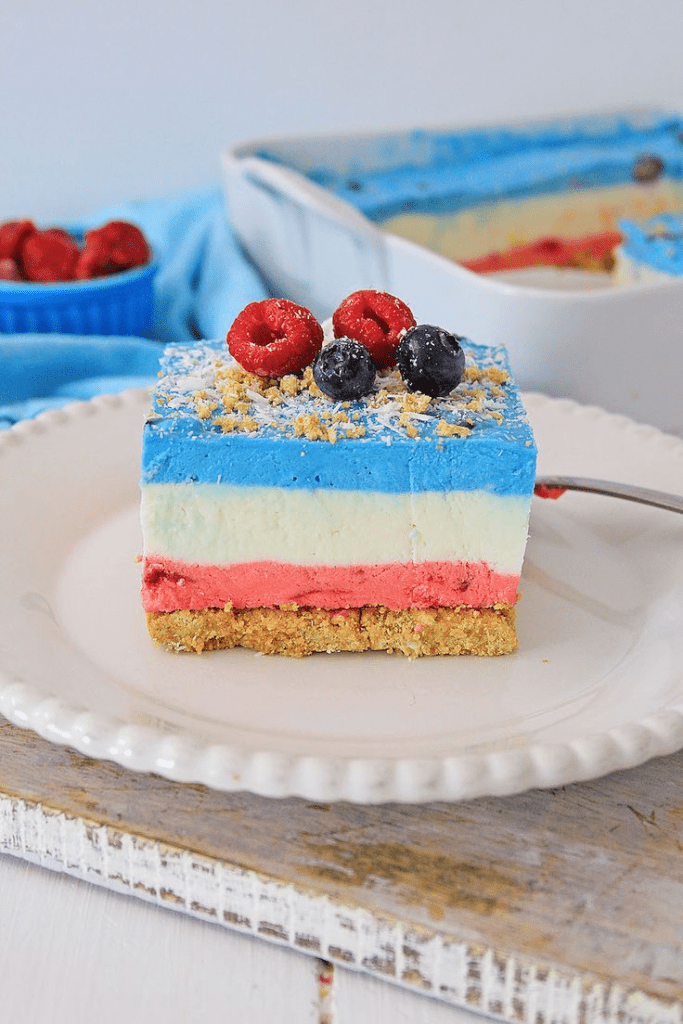
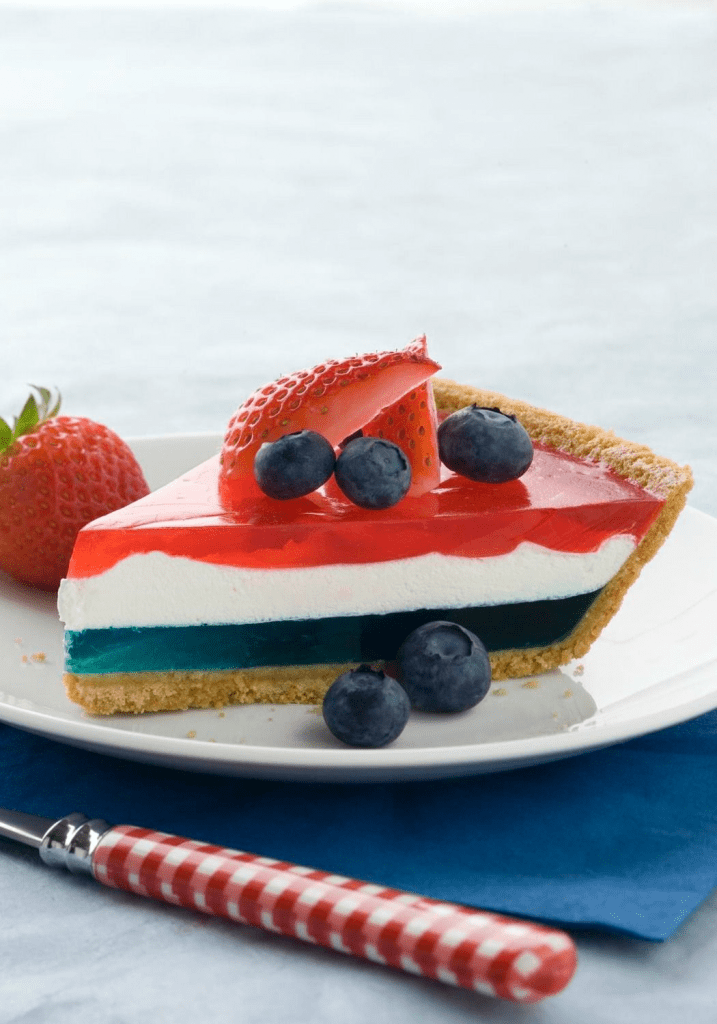
🌟 Effortless Beauty: The vibrant layers of red, white, and blue make this cheesecake a visual stunner. It’s like a flag in dessert form, perfect for patriotic holidays or any festive gathering. With minimal effort, you’ll create a dessert that looks like it took hours to perfect.
🌞 No Oven, No Stress: On hot summer days, the last thing you want is to turn on the oven. This no-bake recipe keeps your kitchen cool and your mood relaxed. All you need is a little prep and some chill time in the fridge.
🕒 Make-Ahead Magic: This cheesecake is even better when made a day or two in advance. The flavors meld together, and the texture becomes irresistibly smooth. It’s a stress-free option for entertaining, leaving you free to enjoy the party.
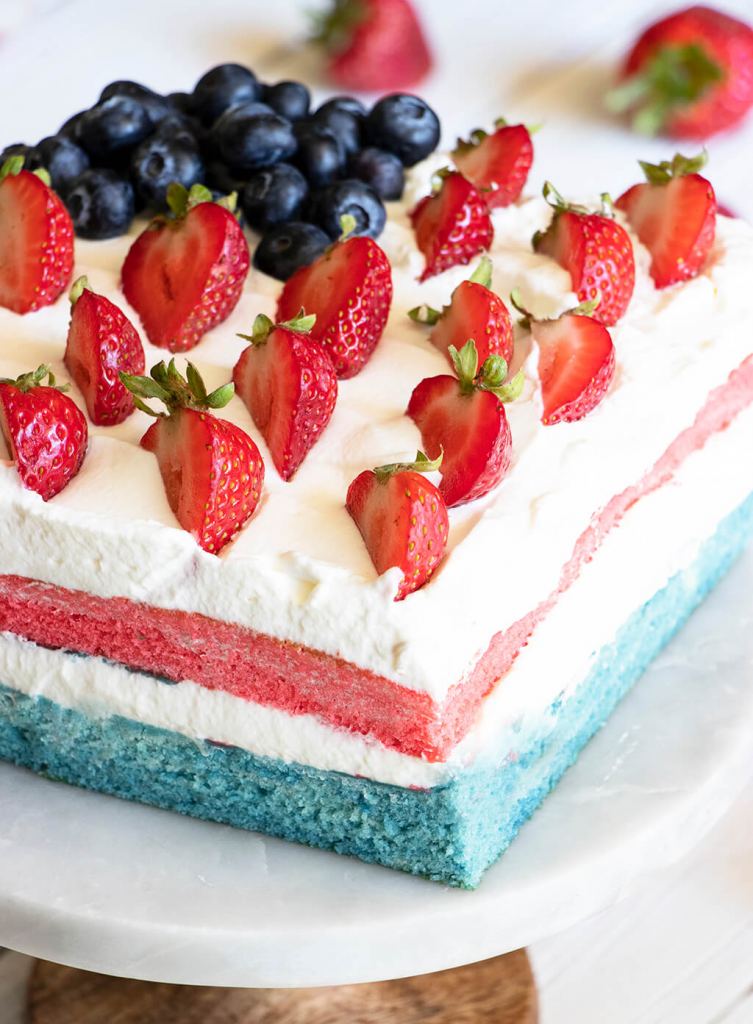
🍓 Fresh and Flavorful: The combination of tangy cream cheese, sweet whipped cream, and juicy berries creates a dessert that’s rich yet refreshing. Each bite is a burst of creamy, fruity goodness that keeps you coming back for more.
This cheesecake isn’t just a recipe—it’s a memory-maker. Picture your guests’ eyes lighting up as you bring out this vibrant dessert, their forks diving into the creamy layers, and the compliments that follow. It’s the kind of dish that becomes a tradition, requested at every summer barbecue or holiday picnic.
The Story Behind This Patriotic Dessert
The inspiration for this cheesecake came from a sunny Fourth of July barbecue, where I wanted to bring something that screamed celebration but didn’t require hours in the kitchen. I experimented with layers, flavors, and colors until this no-bake beauty was born. The first time I served it, the dessert vanished within minutes, and my friends haven’t stopped asking for it since. My daughter even declares summer has officially begun when she sees this cheesecake chilling in the fridge.
Patriotic desserts have a rich history, dating back to World War II when red, white, and blue treats became a way to show unity and pride through food. This modern take honors that tradition while embracing contemporary ingredients and techniques. The layered design mimics the iconic flag, with each bite offering a perfect balance of creamy, crunchy, and fruity flavors. It’s a dessert that feels nostalgic yet fresh, making it a timeless addition to any celebration.
Ingredients You’ll Need for This Showstopper
To create this no-bake patriotic cheesecake, you’ll need a handful of simple ingredients that come together to form something extraordinary. Each component plays a crucial role in building the dessert’s texture, flavor, and visual appeal.
For the Crust:
🍪 2 cups golden Oreo crumbs – These provide a sweet, vanilla-infused base that pairs perfectly with the creamy filling.
🧈 3 tablespoons melted butter – Binds the crumbs for a buttery, cohesive crust.
🧂 1/4 teaspoon salt – Enhances the flavor and balances the sweetness.
🎨 1 teaspoon red gel food coloring – Adds a vibrant red hue for that patriotic touch.
For the Filling:
🧀 2 (8 oz) packages cream cheese, softened – The star of the show, delivering that classic cheesecake tang.
🍬 2 cups powdered sugar – Sweetens the filling without overpowering the flavors.
🌿 2 teaspoons vanilla extract – Adds warmth and depth to the cream cheese layer.
🥛 2 cups heavy whipping cream – Creates a light, mousse-like texture.
🍇 1 (3.94 oz) package blue raspberry Jell-O – Forms the striking blue layer.
💧 1 cup boiling water – Dissolves the Jell-O for a smooth, set topping.
For the Topping:
🧀 6 oz cream cheese, softened – Creates a rich, pipeable frosting.
🧈 6 tablespoons butter, softened – Adds smoothness to the frosting.
🍬 3 cups powdered sugar – Sweetens and thickens the frosting for decorating.
🌿 1 teaspoon vanilla extract – Enhances the frosting’s flavor.
🍓 Fresh strawberries, halved – Adds a pop of red and natural sweetness.
🫐 Fresh blueberries – Brings the blue and a burst of juicy flavor.
These ingredients are easy to find, and many are likely already in your pantry. If you need substitutions, don’t worry—graham crackers can replace golden Oreos for the crust, and gluten-free vanilla cookies work for a gluten-free option. Just keep the ratios consistent for the best results.
Step-by-Step Guide to Creating Your Patriotic Cheesecake
This recipe is designed to be approachable, even for beginner bakers. Follow these steps, and you’ll have a dessert that looks like a work of art and tastes like a dream.
Step 1: Craft the Vibrant Crust
Start by pulsing the golden Oreos in a food processor until they form fine crumbs. Add the melted butter, salt, and red gel food coloring, then pulse until the mixture looks like wet sand with an even red hue. Lightly spray a 9-inch springform pan with non-stick spray, then press the crumb mixture firmly into the bottom, bringing some crumbs slightly up the sides for a polished look. Pop the crust in the freezer to set while you prepare the filling. This step ensures clean, defined layers.
Step 2: Whip Up the Fluffy Cream Base
In a mixing bowl or stand mixer, whisk the heavy whipping cream with 1 cup powdered sugar and 1 teaspoon vanilla extract for 4-5 minutes until soft peaks form. The texture should be smooth and billowy, holding its shape but still soft. Be careful not to overwhip, as this can lead to a grainy texture. Set the whipped cream aside—it’s the key to the dessert’s light, airy consistency.
Step 3: Make the Creamy Cheesecake Layer
In a separate bowl, beat the softened cream cheese until completely smooth. Add the remaining 1 cup powdered sugar and 1 teaspoon vanilla extract, then mix for a full 5 minutes to ensure no lumps remain. Lumps can ruin the silky texture, so take your time here. Gently fold in half of the whipped cream until fully combined, creating a light yet stable cheesecake layer.
Step 4: Create the Bold Blue Layer
Dissolve the blue raspberry Jell-O in 1 cup boiling water, whisking until fully mixed. Let it cool to room temperature—this is crucial to avoid deflating the whipped cream or setting prematurely. Once cooled, whisk the Jell-O into the remaining whipped cream until smooth and vibrant. This layer adds the iconic blue to your patriotic design.
Step 5: Assemble the Layers
Remove the crust from the freezer and spread the cream cheese mixture evenly over it, smoothing the surface with an offset spatula for a clean look. Carefully pour the blue Jell-O mixture on top, ensuring the layers remain distinct for that dramatic effect. Refrigerate the cheesecake for at least 5 hours, or ideally overnight, to let it set perfectly.
Step 6: Decorate with Flair
For the frosting, cream together the softened cream cheese and butter for 4-5 minutes until smooth. Add the vanilla extract, then gradually mix in the powdered sugar, one cup at a time, until thick and pipeable. Transfer the frosting to a piping bag fitted with a large star tip and pipe swirls around the edge of the set cheesecake. Arrange halved strawberries and fresh blueberries in an alternating pattern for a festive, polished finish.
Pro Tips for a Perfect Cheesecake Every Time
🍰 Soften Cream Cheese Thoroughly: Let the cream cheese sit at room temperature for at least 2 hours to avoid lumps in the filling. A smooth texture is non-negotiable for this dessert.
🧊 Cool the Jell-O Properly: The Jell-O mixture should be just barely warm when mixed with the whipped cream. Too hot, and it’ll deflate the cream; too cold, and it’ll set before you can pour it.
🔧 Use a Springform Pan: A 9-inch springform pan with a removable bottom makes it easy to release the cheesecake and creates a professional presentation.
✂️ Cut Clean Slices: For neat slices, dip a sharp knife in hot water and wipe it clean between cuts. This ensures each piece looks as good as it tastes.
These tips will elevate your cheesecake from great to unforgettable, ensuring every layer is perfect and every bite is divine.
Serving and Storing Your Patriotic Masterpiece
This cheesecake serves 14 generous portions, making it ideal for larger gatherings. For the best flavor and texture, serve it well-chilled, straight from the fridge. If you’re hosting outdoors, keep it refrigerated until just before serving, as the layers can soften in warm weather.
To store, cover the cheesecake tightly and keep it in the refrigerator for up to 2 days. The flavors actually improve with time, so don’t hesitate to make it ahead. If you have leftovers (though that’s rare!), they’ll stay fresh for up to 5 days. Avoid freezing, as the Jell-O layer may lose its texture.
Why This Dessert Keeps Guests Coming Back
The No-Bake Patriotic Cheesecake isn’t just a treat—it’s an experience. The creamy layers, crunchy crust, and fresh berries create a symphony of textures and flavors that dance on your palate. It’s rich yet light, indulgent yet refreshing, making it impossible to stop at one slice. The vibrant colors spark joy before you even take a bite, and the ease of preparation means you can focus on making memories with your loved ones.
This dessert has a way of bringing people together. It’s the centerpiece of laughter-filled barbecues, the star of holiday tables, and the sweet ending to countless celebrations. Each time I serve it, I’m reminded of the power of simple ingredients to create something extraordinary.
Make It Your Own
Feel like tweaking the recipe? You can swap golden Oreos for graham crackers or gluten-free vanilla cookies for a different crust vibe. If blue raspberry Jell-O isn’t your thing, try blueberry or berry-flavored gelatin for a similar effect. You can even experiment with different berries for the topping—raspberries or blackberries add a fun twist.
For a lighter version, use reduced-fat cream cheese, though the texture may be slightly less rich. The beauty of this recipe is its versatility, so don’t be afraid to add your personal touch while keeping the patriotic spirit alive.
A Dessert Worth Celebrating
The No-Bake Patriotic Cheesecake is more than a recipe—it’s a celebration in every bite. It’s the joy of sharing something beautiful and delicious with the people you love. It’s the satisfaction of creating a dessert that looks like a masterpiece but comes together with ease. And it’s the pride of serving a dish that honors tradition while delighting modern palates.
So, grab your ingredients, clear some space in the fridge, and get ready to create a dessert that will have everyone talking. Whether it’s for a summer barbecue, a holiday gathering, or just because, this cheesecake is your ticket to sweet, patriotic perfection. Let’s make every moment a little more delicious—and a lot more memorable.
Ready to impress? Whip up this No-Bake Patriotic Cheesecake and watch it become the star of your next celebration!


