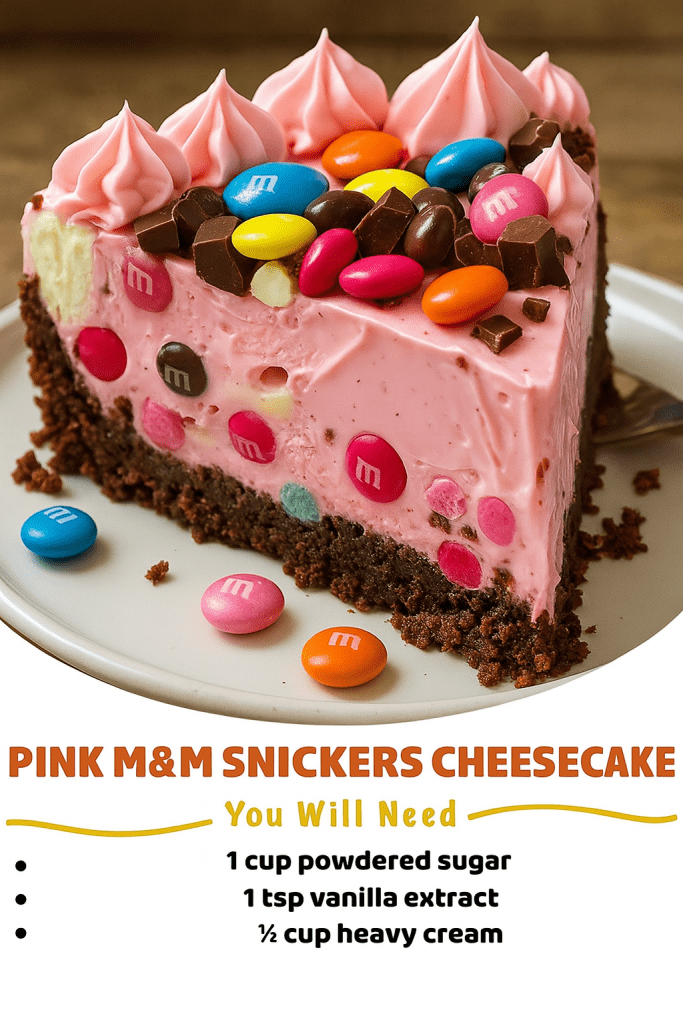
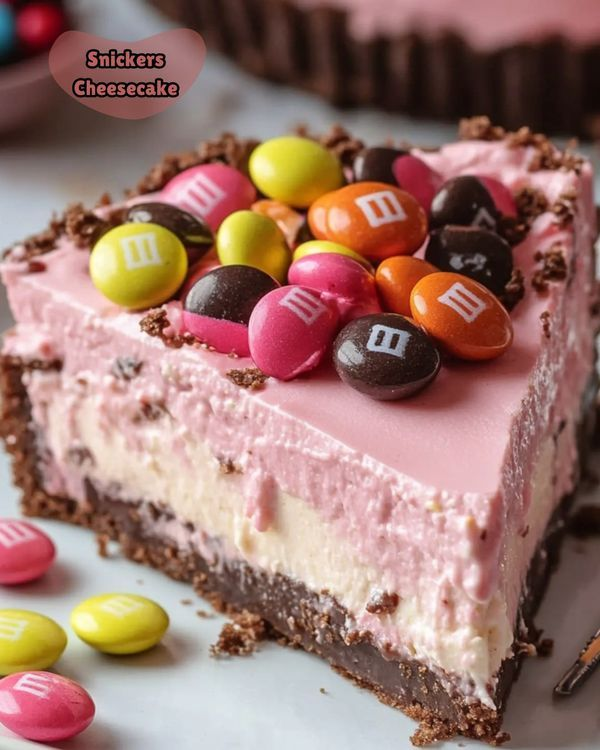
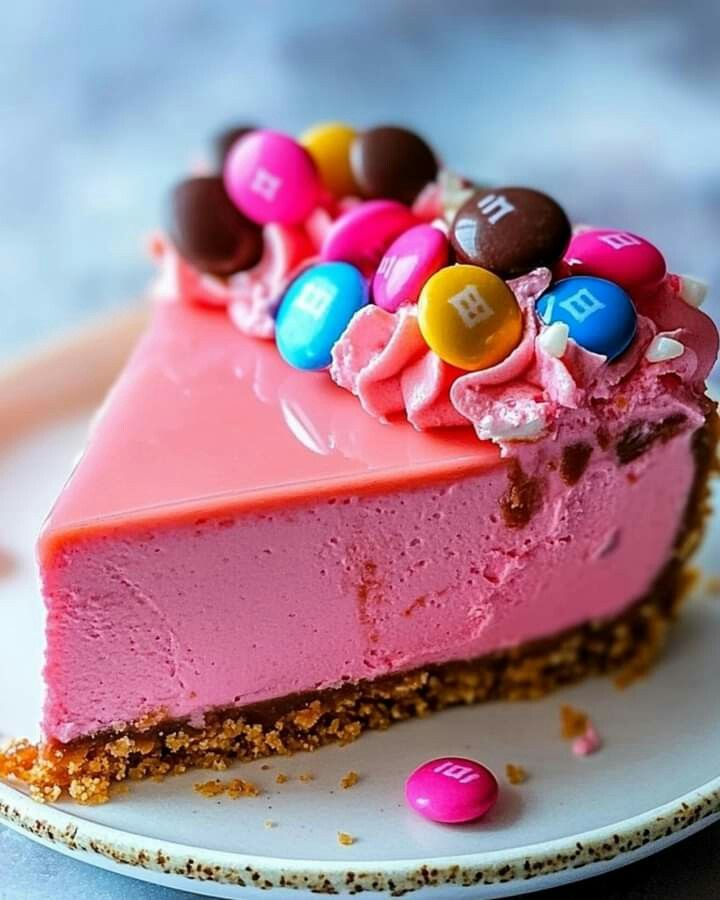
🌸 Imagine a dessert that’s as joyful to look at as it is to eat. The Pink M&M Snickers Cheesecake is a vibrant, no-bake masterpiece that combines creamy indulgence with playful bursts of candy. This dessert isn’t just food—it’s a celebration on a plate, perfect for birthdays, picnics, or any moment you want to make special. With its bright pink filling, crunchy cookie crust, and colorful candy toppings, it’s designed to steal the show and keep everyone coming back for more.
Let’s dive into why this cheesecake will become your go-to treat and how you can create it with ease. From its silky texture to its crowd-pleasing flavors, this recipe is crafted to spark joy and satisfy sweet cravings. Ready to make dessert magic? Here’s everything you need to know.
Why This Dessert Wins Hearts
🎉 No Oven, No Stress: This cheesecake skips the baking hassle, making it perfect for hot summer days or busy schedules. You mix, chill, and serve—simple as that.
🌈 A Pop of Pink: The vibrant pink filling isn’t just eye-catching; it sets a fun, festive vibe. Whether it’s a baby shower, Valentine’s Day, or a girls’ night in, this dessert screams celebration.
🍫 Candy-Packed Bliss: Chopped Snickers bars bring chewy caramel, nutty crunch, and chocolatey richness, while M&Ms add a playful snap of color and texture. Every bite is an adventure.
🥄 Make-Ahead Magic: Prep it the day before, and it’s ready to shine when you are. This dessert is a lifesaver for stress-free entertaining.
💖 Crowd-Pleaser Guaranteed: From kids to adults, this cheesecake vanishes fast. It’s the kind of treat that sparks smiles and second helpings. I once brought it to a family picnic, and my niece’s giggles as she sprinkled M&Ms on top made it a memory I’ll always cherish.
The Ingredients That Make It Shine
Great desserts start with great ingredients, and this cheesecake is no exception. Here’s what you’ll need to create this pink paradise, along with tips to make each component perfect.
🍪 Cookie Crumbs (1 ½ cups): Graham crackers give a classic, slightly sweet base, but crushed Oreos add a bold chocolate kick. Choose fresh cookies for the best texture and flavor.
🧈 Melted Unsalted Butter (⅓ cup): This binds the crust and adds rich depth. A high-quality European-style butter can elevate the flavor even more.
🍫 Semi-Sweet Chocolate Chips (2 cups): These melt into the filling for a fudgy, chocolatey note. Look for glossy chips with no chalky spots for the smoothest result.
🧀 Cream Cheese (3 x 8 oz packs, softened): The heart of the filling, this creates that creamy, dreamy texture. Use full-fat blocks and let them soften to room temperature for easy blending.
🍬 Powdered Sugar (1 cup): Sweetens the filling and keeps it smooth. Sift it first to avoid any lumps.
🥛 Heavy Cream (½ cup): Whipped to stiff peaks, this lightens the filling into a fluffy, mousse-like texture. Keep it cold for the best results.
🌟 Vanilla Extract (1 tsp): A splash of pure vanilla rounds out the flavors, adding warmth and balance.
🍫 Snickers Bars (1 cup, chopped): These bring chewy, nutty, caramel-filled bites to every slice. Pick plump, fresh bars for maximum juiciness.
🌸 Pink Food Coloring: Gel coloring gives the boldest, most even pink hue without thinning the filling. Add it gradually to get your perfect shade.
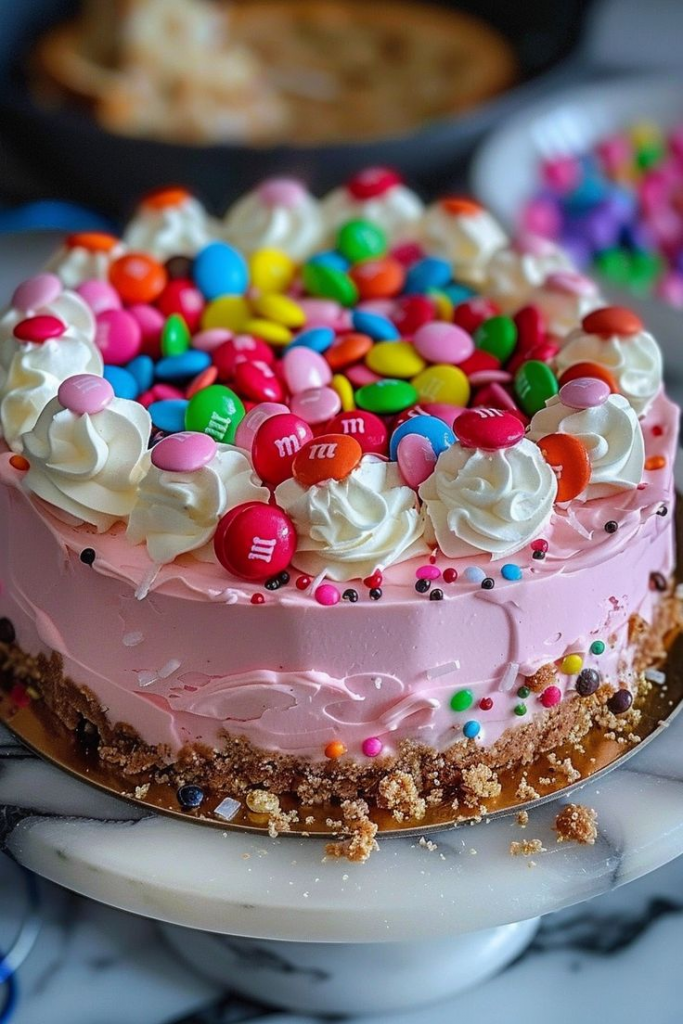
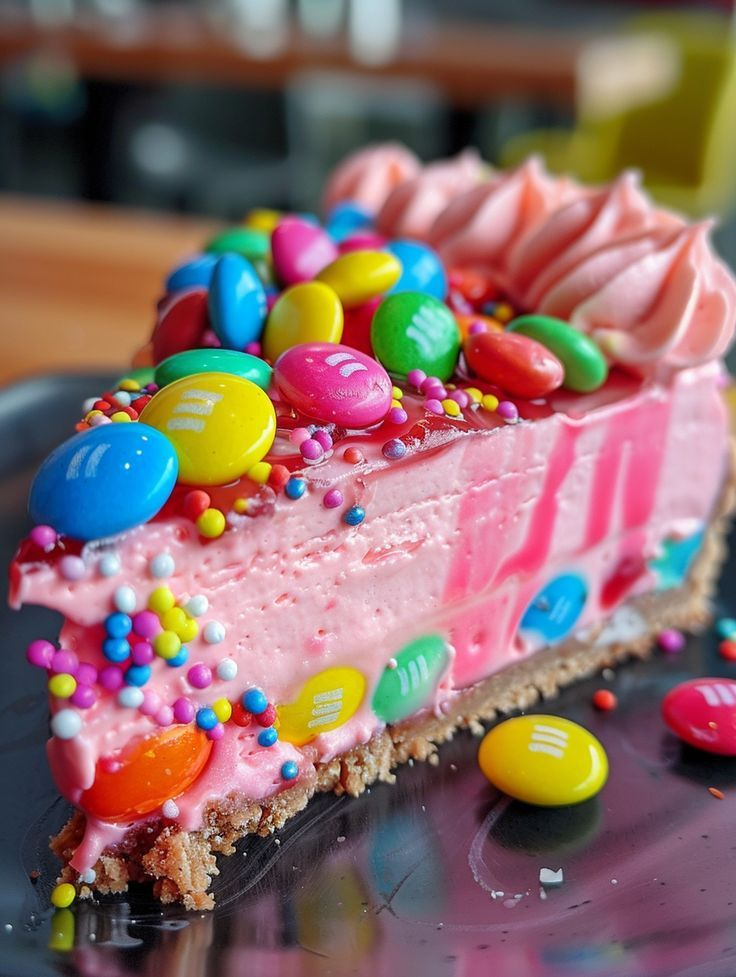
🍭 M&Ms and Whipped Cream (for topping): These add crunch, color, and a light, creamy finish. Use classic M&Ms and homemade whipped cream for the ultimate touch.
Step-by-Step: How to Create Your Pink Masterpiece
This recipe is as fun to make as it is to eat. Follow these simple steps, and you’ll have a stunning cheesecake that looks like it came from a bakery.
Step 1: Craft the Crunchy Crust
Start by turning your cookies into fine crumbs. Seal them in a sturdy bag and crush with a rolling pin, or pulse them in a food processor for speed. You want a slightly textured crumb for the best crunch. Mix the crumbs with melted butter until they clump together like wet sand. Press this mixture firmly into the bottom of a springform pan, using the bottom of a measuring cup to create a smooth, even layer. Pop the crust in the fridge for 30 minutes to firm up while you prep the filling.
Step 2: Melt the Chocolate
Place your semi-sweet chocolate chips in a pan over medium heat. Stir gently and constantly to avoid scorching, until the chocolate is glossy and smooth. Remove from heat and let it cool slightly—warm, not hot, chocolate blends best into the filling.
Step 3: Whip Up the Creamy Base
Using an electric mixer, beat the softened cream cheese, powdered sugar, and vanilla extract until silky and smooth. This step is key for a lump-free filling, so take your time. Gradually pour in the cooled melted chocolate, mixing until fully combined. The result should be rich, creamy, and chocolatey.
Step 4: Add the Snickers
Gently fold in the chopped Snickers bars with a spatula. These candy pieces add delightful bursts of caramel, nougat, and peanuts, so make sure they’re evenly distributed for candy in every bite.
Step 5: Create the Pink Magic
Scoop a small portion of the filling into a separate bowl and stir in a few drops of pink food coloring. Gel coloring gives the boldest hue, but liquid works too—just add sparingly. Fold the colored filling back into the main batch, mixing gently until the pink is even and vibrant. This step is where the dessert transforms into a showstopper.
Step 6: Lighten with Whipped Cream
Whip the cold heavy cream until stiff peaks form—lift the beater to check if the cream stands tall. Carefully fold this whipped cream into the pink filling, using light, gentle strokes to keep the texture airy. Overmixing can deflate the cream, so stop as soon as it’s blended.
Step 7: Assemble and Chill
Pour the pink filling over the chilled crust, smoothing the top with a spatula for a polished look. Cover the pan with plastic wrap and refrigerate for at least 4 hours, though overnight is best for clean, firm slices. This waiting time lets the flavors meld and the filling set perfectly.
Step 8: Decorate and Serve
Once set, remove the cheesecake from the springform pan and transfer it to a serving plate. Pipe or dollop whipped cream on top, then sprinkle with M&Ms and extra Snickers chunks for a playful, candy-packed finish. Slice with a hot, clean knife for neat portions, and watch your guests’ eyes light up.
Why You’ll Keep Coming Back to This Recipe
This Pink M&M Snickers Cheesecake isn’t just a dessert—it’s an experience. The creamy filling melts in your mouth, the crust adds just the right crunch, and the candy toppings bring a burst of fun. It’s versatile enough for any occasion, from casual gatherings to fancy parties, and it’s forgiving enough for beginner bakers. Plus, the no-bake method means you can whip it up without breaking a sweat.
I remember the first time I made this for a friend’s birthday. The room went quiet as everyone took their first bite, then erupted in compliments. It’s become my signature dessert, and I love how it brings people together. Whether you’re sharing it with family or surprising coworkers, this cheesecake has a way of making moments memorable.
Pro Tips for Perfection
🔪 Clean Slices: Wipe your knife with a hot, wet cloth between cuts for picture-perfect slices.
🍫 Smooth Chocolate: Let the melted chocolate cool slightly before adding it to the cream cheese to avoid a grainy texture.
🕒 Chill Smart: Overnight chilling gives the best texture and flavor, so plan ahead if you can.
🌈 Color Control: Add food coloring a drop at a time—gel is potent, and a little goes a long way.
🍬 Candy Prep: Chop Snickers just before using to keep them fresh and chewy in the filling.
Storage and Make-Ahead Tips
This cheesecake is a dream for planners. Store it in the fridge, tightly covered, to keep it fresh and prevent it from absorbing fridge odors. It stays perfect for up to three days, though the crust may soften slightly over time.
For longer storage, freeze individual slices. Wrap each slice tightly in plastic wrap, then place in a freezer-safe bag. Thaw overnight in the fridge for a treat that’s just as delicious as the day you made it. This makes it easy to enjoy a slice whenever a craving strikes.
Mix It Up: Substitutions and Variations
One of the best things about this recipe is its flexibility. Here are some ways to make it your own.
🍬 Candy Swaps: Not a Snickers fan? Try Milky Way, Twix, or peanut butter cups for a different flavor profile. For a nut-free option, Twix is a great choice.
🍪 Crust Options: Swap graham crackers for vanilla wafers, chocolate teddy grahams, or even lemon cookies for a zesty twist. Each brings a unique vibe to the dessert.
🌸 Color Play: While pink is the star, you can experiment with other colors like purple or blue for different themes. Just keep the gel coloring subtle to avoid overpowering the flavor.
Serving Ideas to Wow Your Guests
This cheesecake is a natural centerpiece, but a few thoughtful touches can make it even more unforgettable.
🎂 Party Star: Serve at birthdays, baby showers, or bridal parties for a dessert that doubles as decor. The pink hue and candy toppings make it Instagram-worthy.
☕ Perfect Pairing: Pair thin slices with strong coffee or hot chocolate for a grown-up treat that balances the sweetness.
🧁 Mini Magic: Make individual portions in muffin tins for bite-sized treats that are perfect for kids’ parties or buffets.
📸 Photo Moment: Snap a picture before slicing—the vibrant colors and candy toppings are too pretty not to share.
FAQs: Your Questions Answered
Can I use a different candy?
Absolutely. Swap Snickers for Milky Way, Twix, or any sturdy chocolate candy. Just chop them into bite-sized pieces for easy mixing.
How do I get a bolder pink?
Use gel food coloring for a vibrant hue. Add a drop at a time, mixing well, until you hit your dream shade.
What’s the best crust?
Graham crackers are classic, but Oreos add a chocolatey depth. Both work beautifully—just choose what you love.
Can I make it ahead?
Yes! Prep it a day in advance and chill overnight for the best texture and flavor.
Is it vegetarian?
This recipe is vegetarian, with no gelatin or meat-derived ingredients. Double-check your candy labels to be sure.
How do I store it?
Keep leftovers in an airtight container in the fridge for up to three days. For longer, freeze slices and thaw in the fridge.
A Dessert That Sparks Joy
The Pink M&M Snickers Cheesecake is more than a recipe—it’s a way to bring people together. Its playful colors, creamy texture, and candy-packed bites make it a treat that lingers in hearts and taste buds. Whether you’re a seasoned baker or a first-timer, this no-bake dessert is easy to master and impossible to resist.
So grab your ingredients, channel your inner dessert artist, and create a slice of pink paradise. Your guests will thank you, your sweet tooth will thank you, and you’ll have a new favorite recipe to share for years to come. Happy chilling, and enjoy every creamy, crunchy bite!
Recipe Snapshot
Prep Time: 25 minutes
Chill Time: 4+ hours
Servings: 12
Skill Level: Moderate
Cuisine: American
Diet: Vegetarian
Ingredients
Crust:
1 ½ cups graham cracker crumbs or crushed Oreos
⅓ cup melted unsalted butter
Filling:
3 (8 oz) packs cream cheese, softened
1 cup powdered sugar
1 tsp vanilla extract
½ cup heavy cream
2 cups semi-sweet chocolate chips, melted and cooled
1 cup chopped Snickers bars
Pink food coloring
Toppings:
Whipped cream
M&Ms
Extra Snickers chunks (optional)
Instructions
Crush cookies into fine crumbs. Mix with melted butter and press into a springform pan. Chill for 30 minutes.
Melt chocolate chips over medium heat, stirring until smooth. Cool slightly.
Beat cream cheese, powdered sugar, and vanilla until smooth. Mix in melted chocolate. Fold in chopped Snickers.
Mix a small portion of filling with pink food coloring, then blend into the main filling.
Whip heavy cream to stiff peaks. Fold into the pink filling.
Pour filling over crust, smooth the top, and chill for 4+ hours.
Top with whipped cream, M&Ms, and Snickers. Slice and serve.
🌟 Pro Tip: Chill overnight for the best flavor and texture. Use a hot knife for clean slices.
This dessert is your ticket to sweet, stress-free bliss. Make it, share it, and watch the smiles light up the room.


